Trying to install VMware ESXi on a number of Intel Bay-Trail boards apparently
fails with a hanged installation right after a message like Relocating modules and starting the kernel. There’s multiple forum posts around the internet
where people suggest various workarounds, which never seemed to work for me.
One suggestion which stood out to me as most promising was completely disabling the internal graphics chip and using a dicrete graphics card in the PCI Express slot. Now, I didn’t want to buy a graphics card just to make the installation work - especially since this system would mostly be used completely headless: power cord, two ethernet cables and done.
The Supermicro X10SBA board does provide a couple of COM ports though and since I’ve never actually used a serial connection for anything before, I’ve set out to try this route to disabling the graphics chip. (Sidenote: my newer server is a Supermicro SYS-5028D-T4NT, which has a platform management interface (IPMI). Boy, does that make life easier.)
Serial connection#
Cables#
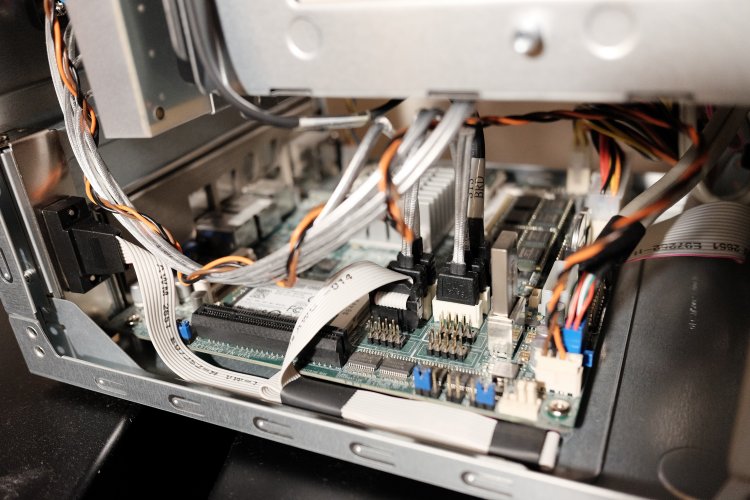
To route the internal COM1 header to the ‘outside world’ I used Supermicro’s low-profile COM port bracket CBL-0010-LP. To connect to that RS-232 port, I then used a USB to Null Modem cable from StarTech.
Settings#
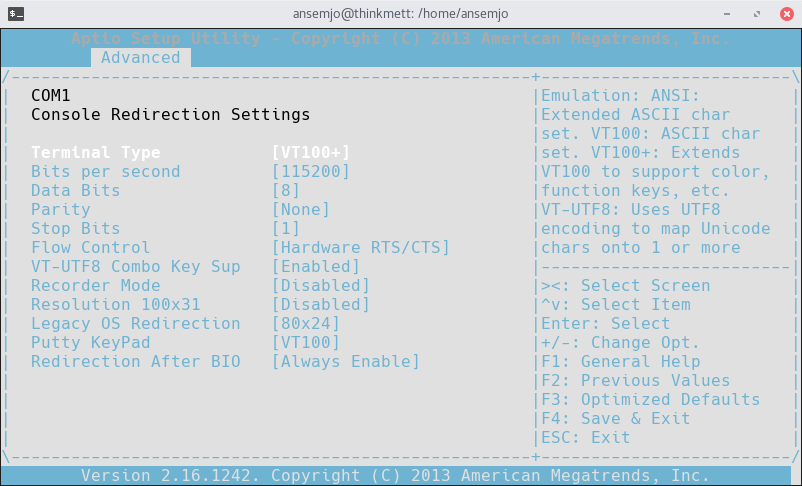
I am not sure about the default BIOS settings but I believe Console Redirection on COM1 is enabled by default. If it is not you can find it at
Advanced > Serial Port Console Redirection > "COM1" Console Redirection. You
should also increase the baud rate to something sensible like 115200 in the
Console Redirection Settings. You could certainly change more settings and use
advanced features of the FTDI chip in your nullmodem cable but these settings
work great for me:
To connect from my laptop, I use picocom
after adding my user to the uucp group:
$ ll /dev/ttyUSB*
crw-rw---- 1 root uucp 188, 0 Jan 19 16:15 /dev/ttyUSB0
$ picocom -b 115200 /dev/ttyUSB0
To conclude the settings section, verify that you can successfully connect via
serial and reach the BIOS Setup and then disable the Integrated Graphic Device
under Advanced > Chipset Configuration > North Bridge > Graphics Configuration:
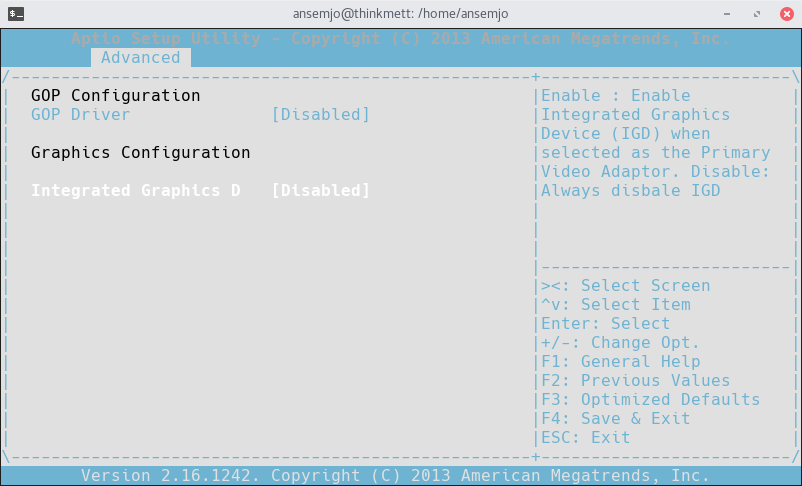
I am actually not sure if this is required. But I disabled it and had no more problems during installation. And since I now had a working serial connection I figured: why not?
Installation Media#
Next, we need to prepare an installation medium. Preferably, I would like to use a USB stick but it turns out this is not directly supported out of the box for ESXi. (On my new server I simply mounted the iso on a virtual disk drive .. hence: IPMI makes your life easier ..) There is a couple of guides using Syslinux (on Linux) or Rufus (on Windows) but none of the Syslinux guides quite worked for me and I had no Windows system at hand. Until I found a post in the VMware communities, where Syslinux is simply used to load the ISO directly.
I later also discovered that you can install ESXi onto the same USB stick that you loaded the installer from, since all the required files are apparently loaded into memory upon startup.
Prepare the USB Stick#
So you’ll probably want to use a 8GB USB stick and make sure it is empty. To
make sure it is really empty and filled with zeroes (which compress nicely when
I later create images of said stick) I ran dd if=/dev/zero of=/dev/sdX status=progress beforehand. (Note: replace /dev/sdX with your actual USB
stick and make sure you don’t delete your running system .. please.)
Then create a new DOS partition table and create one primary bootable partition
and format it with FAT32. Using a scripted approach for fdisk and formatting
with mkfs.vfat:
$ sed 's/\s*\([^\s]*\) #.*/\1/' <<EOF | fdisk /dev/sdX
o # new msdos partiton table
n # new partition
p # primary partition
1 # first partition
  # accept default start
  # accept default end
t # select type
c # select W95 FAT32 (LBA)
a # mark partition active
p # print partition table
w # write to disk
q # and quit
EOF
$ mkfs.vfat -F 32 -n USB /dev/sdX1
Now mount that partition somewhere, install Syslinux on it and copy the VMware Installer ISO.
$ cat /usr/lib/syslinux/bios/mbr.bin > /dev/sdX
$ syslinux /dev/sdX1
$ mount /dev/sdX1 /mnt
$ cp /usr/lib/syslinux/bios/{memdisk,menu.c32,libutil.c32} /mnt/
$ cp ~/Downloads/VMware-VMvisor-Installer-201701001-4887370.x86_64.iso /mnt/
$ cat <<EOF > /mnt/syslinux.cfg
default menu.c32
menu title ISO Loader
nohalt 1
prompt 0
timeout 30

label esxi
  kernel memdisk
  append iso
  initrd VMware-VMvisor-Installer-201701001-4887370.x86_64.iso
  menu label VMware Installer ISO
EOF
$ umount /mnt
I was tempted to add a serial 0 115200 line at the top but that actually kinda
broke the following loader and I could not add the required kernel parameters
for the VMware installer.
Run the Installer#
Insert the prepared USB stick into one of the USB ports of your X10SBA and make sure that you are booting from it. You might need to adjust the boot order in your BIOS. I chose the internal USB-A header on the motherboard.
Since we didn’t install any EFI binaries it should boot in legacy BIOS mode. But just make sure it does anyway because the ISO is certainly containing EFI binaries but we will not be able to add the required kernel options if we are booting through those.
You should be greeted by this screen:
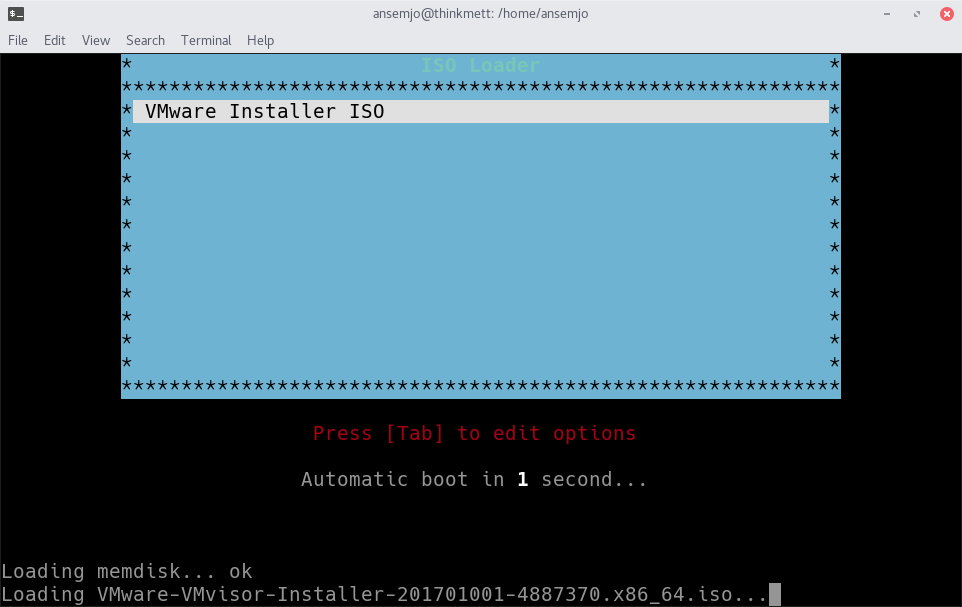
Wait for the ISO to load and then quickly press Tab in the second loader to
add additional kernel options gdbPort=none logPort=none tty2Port=com1:
reference
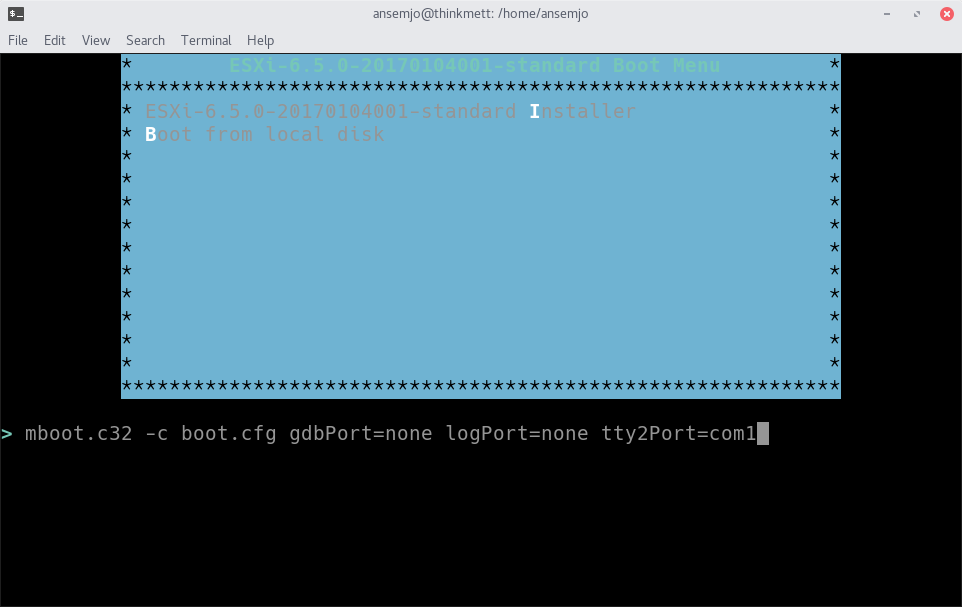
Append those options and press Enter. Nothing will happen for a few seconds until you’ll see loaded modules rushing by and you are finally greeted by the VMware ESXi Installer:
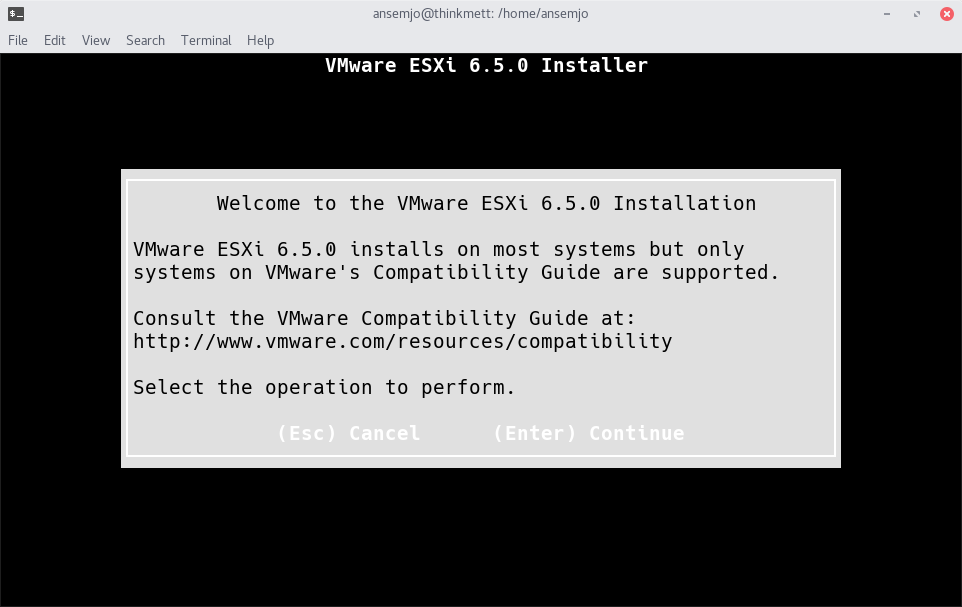
At this point I had to disable the fullscreen shortcut key F11 in my
gnome-terminal settings since this key is used to accept various options in the
Installer.
I will assume that you know how to get through the following steps. Otherwise consult VMware’s own documentation on this. You can install ESXi on the same USB stick that you booted from without any problems - that is exactly what I did.
After the Installation#
At the end, we just need to make sure that the serial console is used on every
boot. You can either mount the fifth and sixth partition of the installed USB
stick and edit both boot.cfg files to append the same options as above to the
kernelopts= line or boot it up once and use the Web Management Interface to
set these settings:
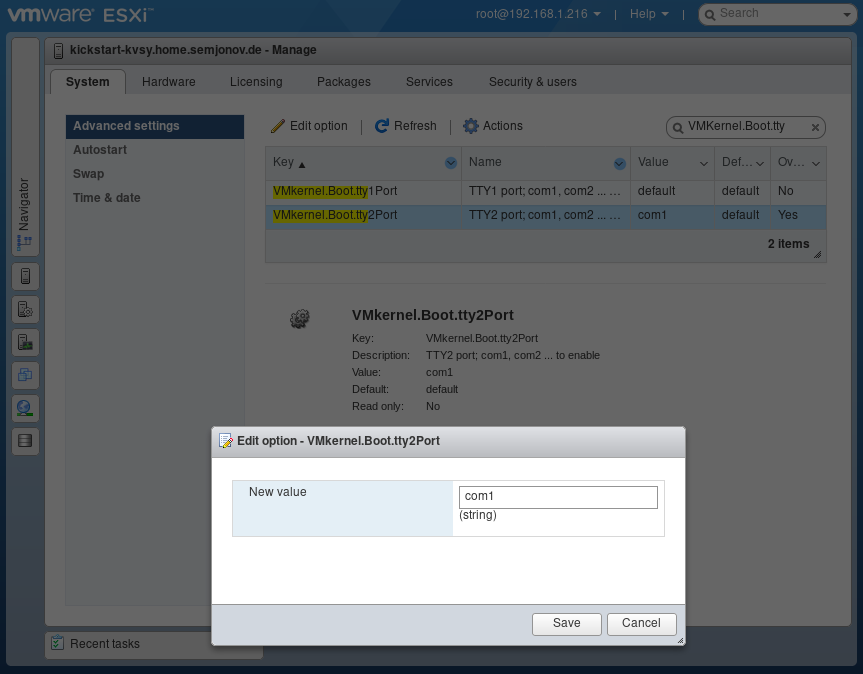
Redirect the Direct Console to a Serial Port from the vSphere Web Client
That assumes that you have a way to find out what IP the web interface uses. Usually you should be able to see a recent DHCP lease in you router though. Don’t panic if it doesn’t immediately show up: ESXi can take a few minutes to fully load until it becomes responsive.
As far as I can tell, the default settings for both VMkernel.Boot.logPort and
VMkernel.Boot.gdbPort disable both, so you only need to set
VMkernel.Boot.tty2Port to com1. If you want to be sure, you can set both
logPort and gdbPort to none to definitely disable them.
After this you can reboot. It shouldn’t matter if you are booting through UEFI or legacy BIOS mode anymore either, since you should see output on the serial console as soon as the VMKernel starts initializing (which takes a little more than a minute in my case).
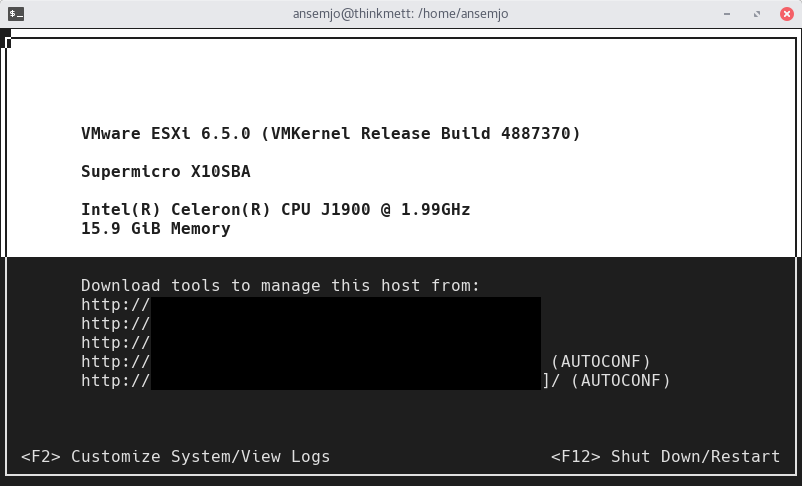
Voilà!
Additional Notes#
I am using this patch tracker to get commands to update to the latest image profile. Click on the profile to pop up the shell commands.
Trying to update to the latest profile resulted in an
[Errno 28] No space left on deviceerror. A user on reddit hinted towards swap space: configure a datastore to be used for swap and retry. My SYS-5028D has 64 GB of RAM, hence I just never hit that limit before I guess.