After finishing my own VFD clock project a while ago, I now bought a ready-made module from Noritake Itron because I wanted to take a look how they do it – especially the filament supply.
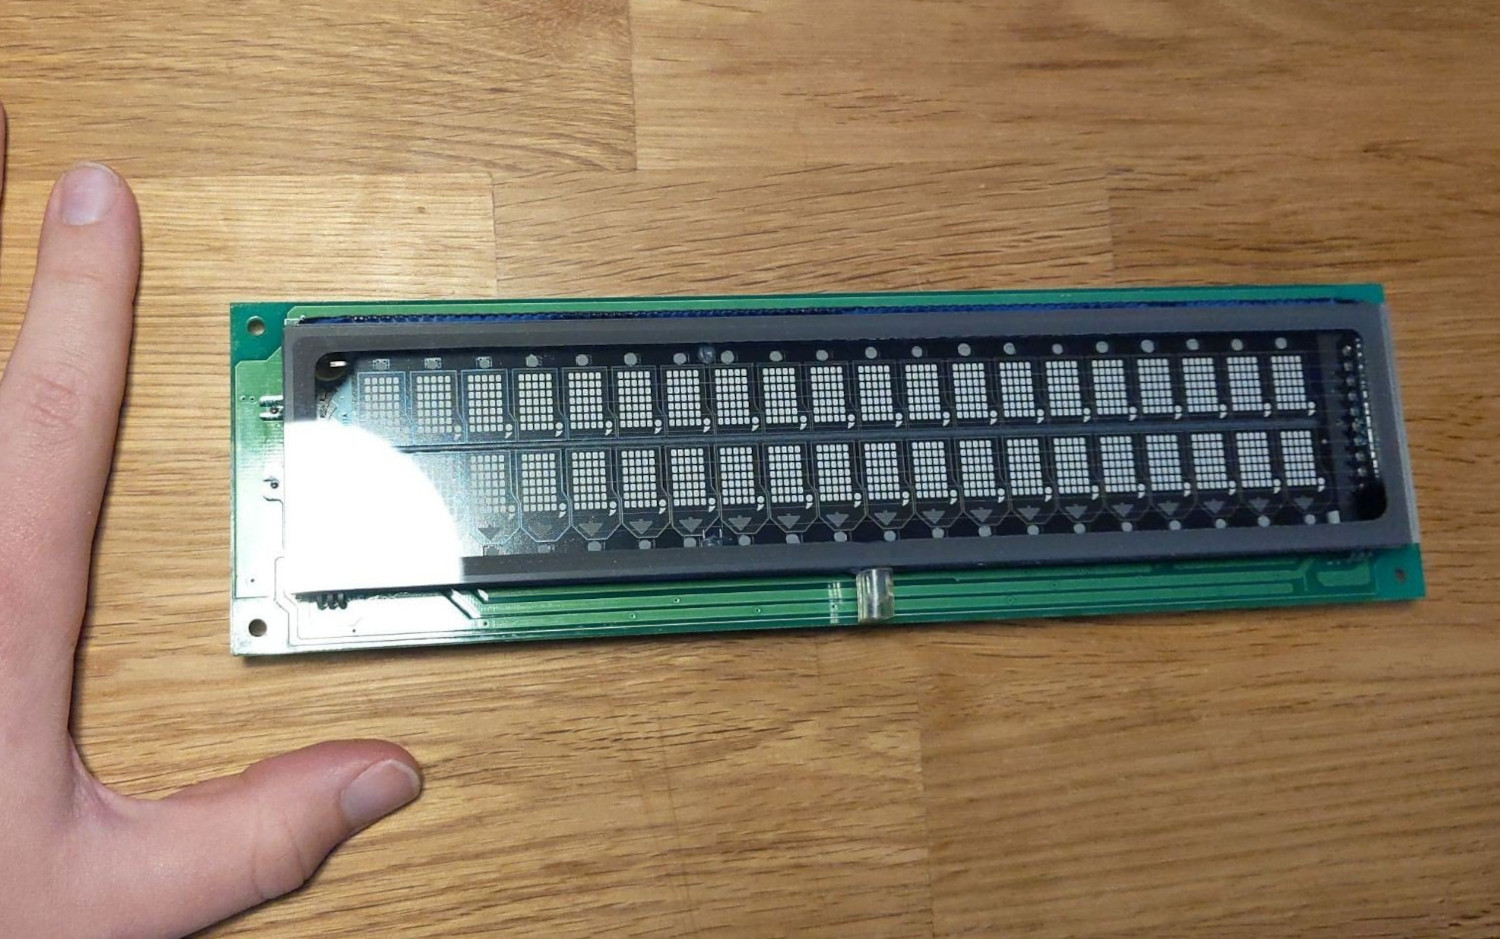
These modules usually sell for somewhere above 50€. But here I found one on eBay for just over 20€. The description had no model number or dimensions but I didn’t care much .. I bought it. Well, what should I say .. this module is huge:
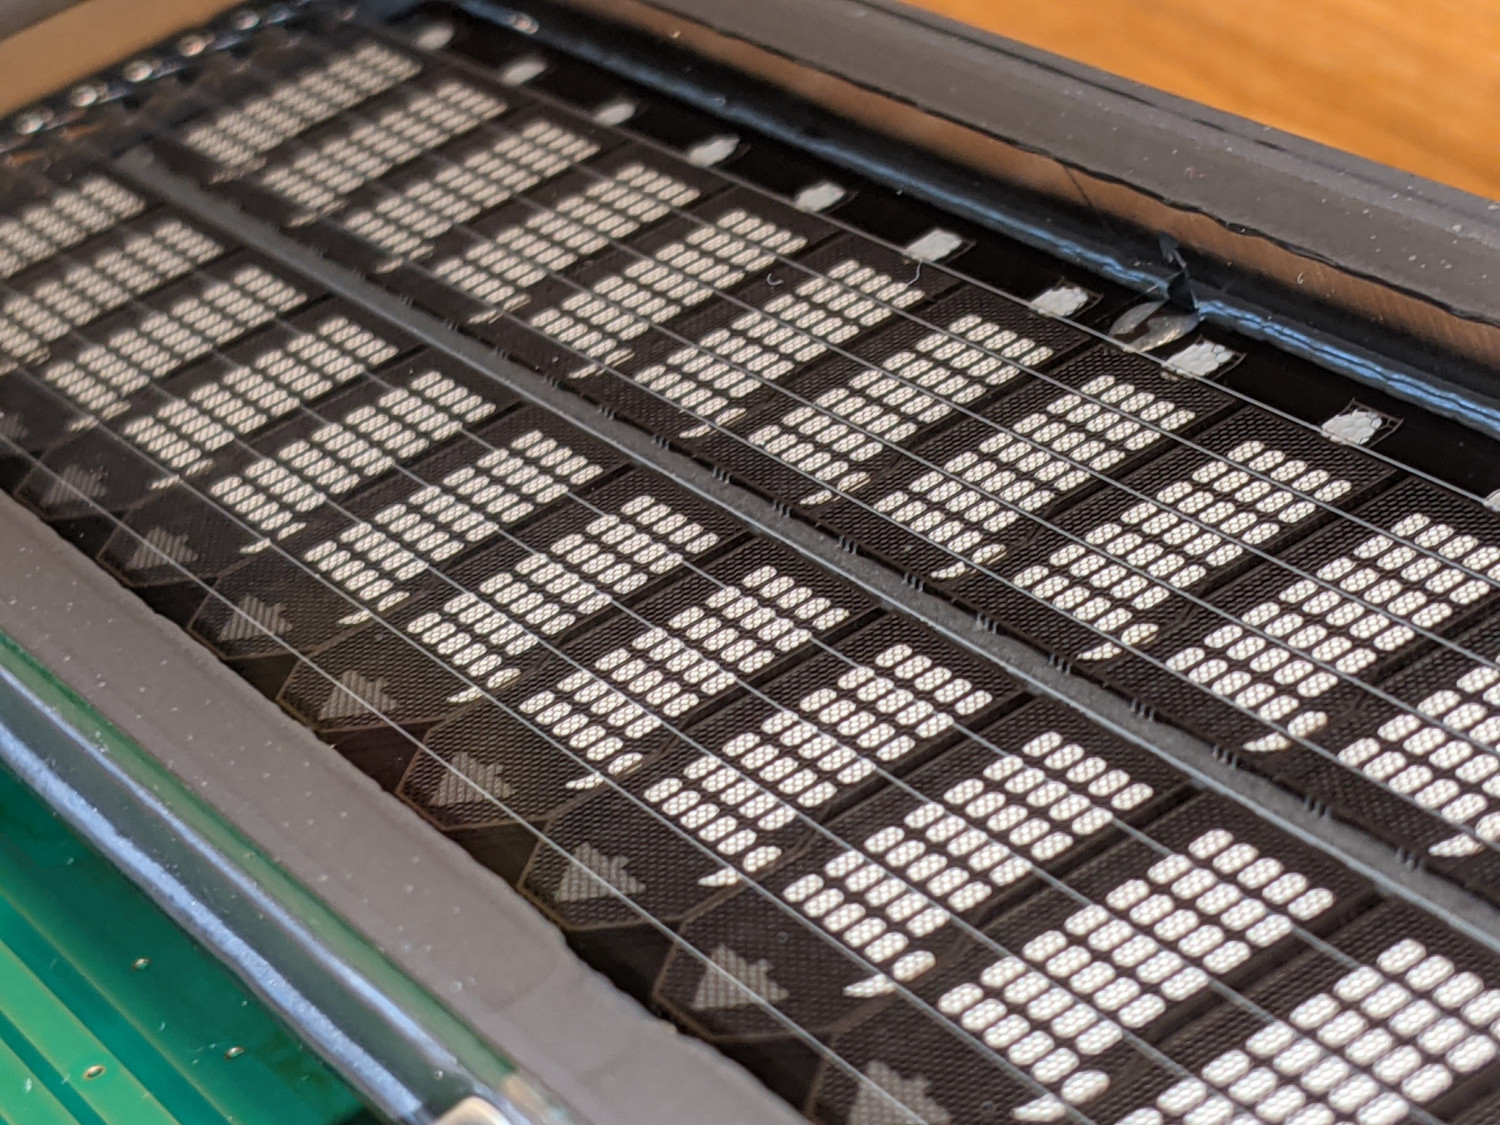
And look at these beautiful segments and grids!
According to the PCB date under the display, this thing is older than me. Here’s a shot of the backside:
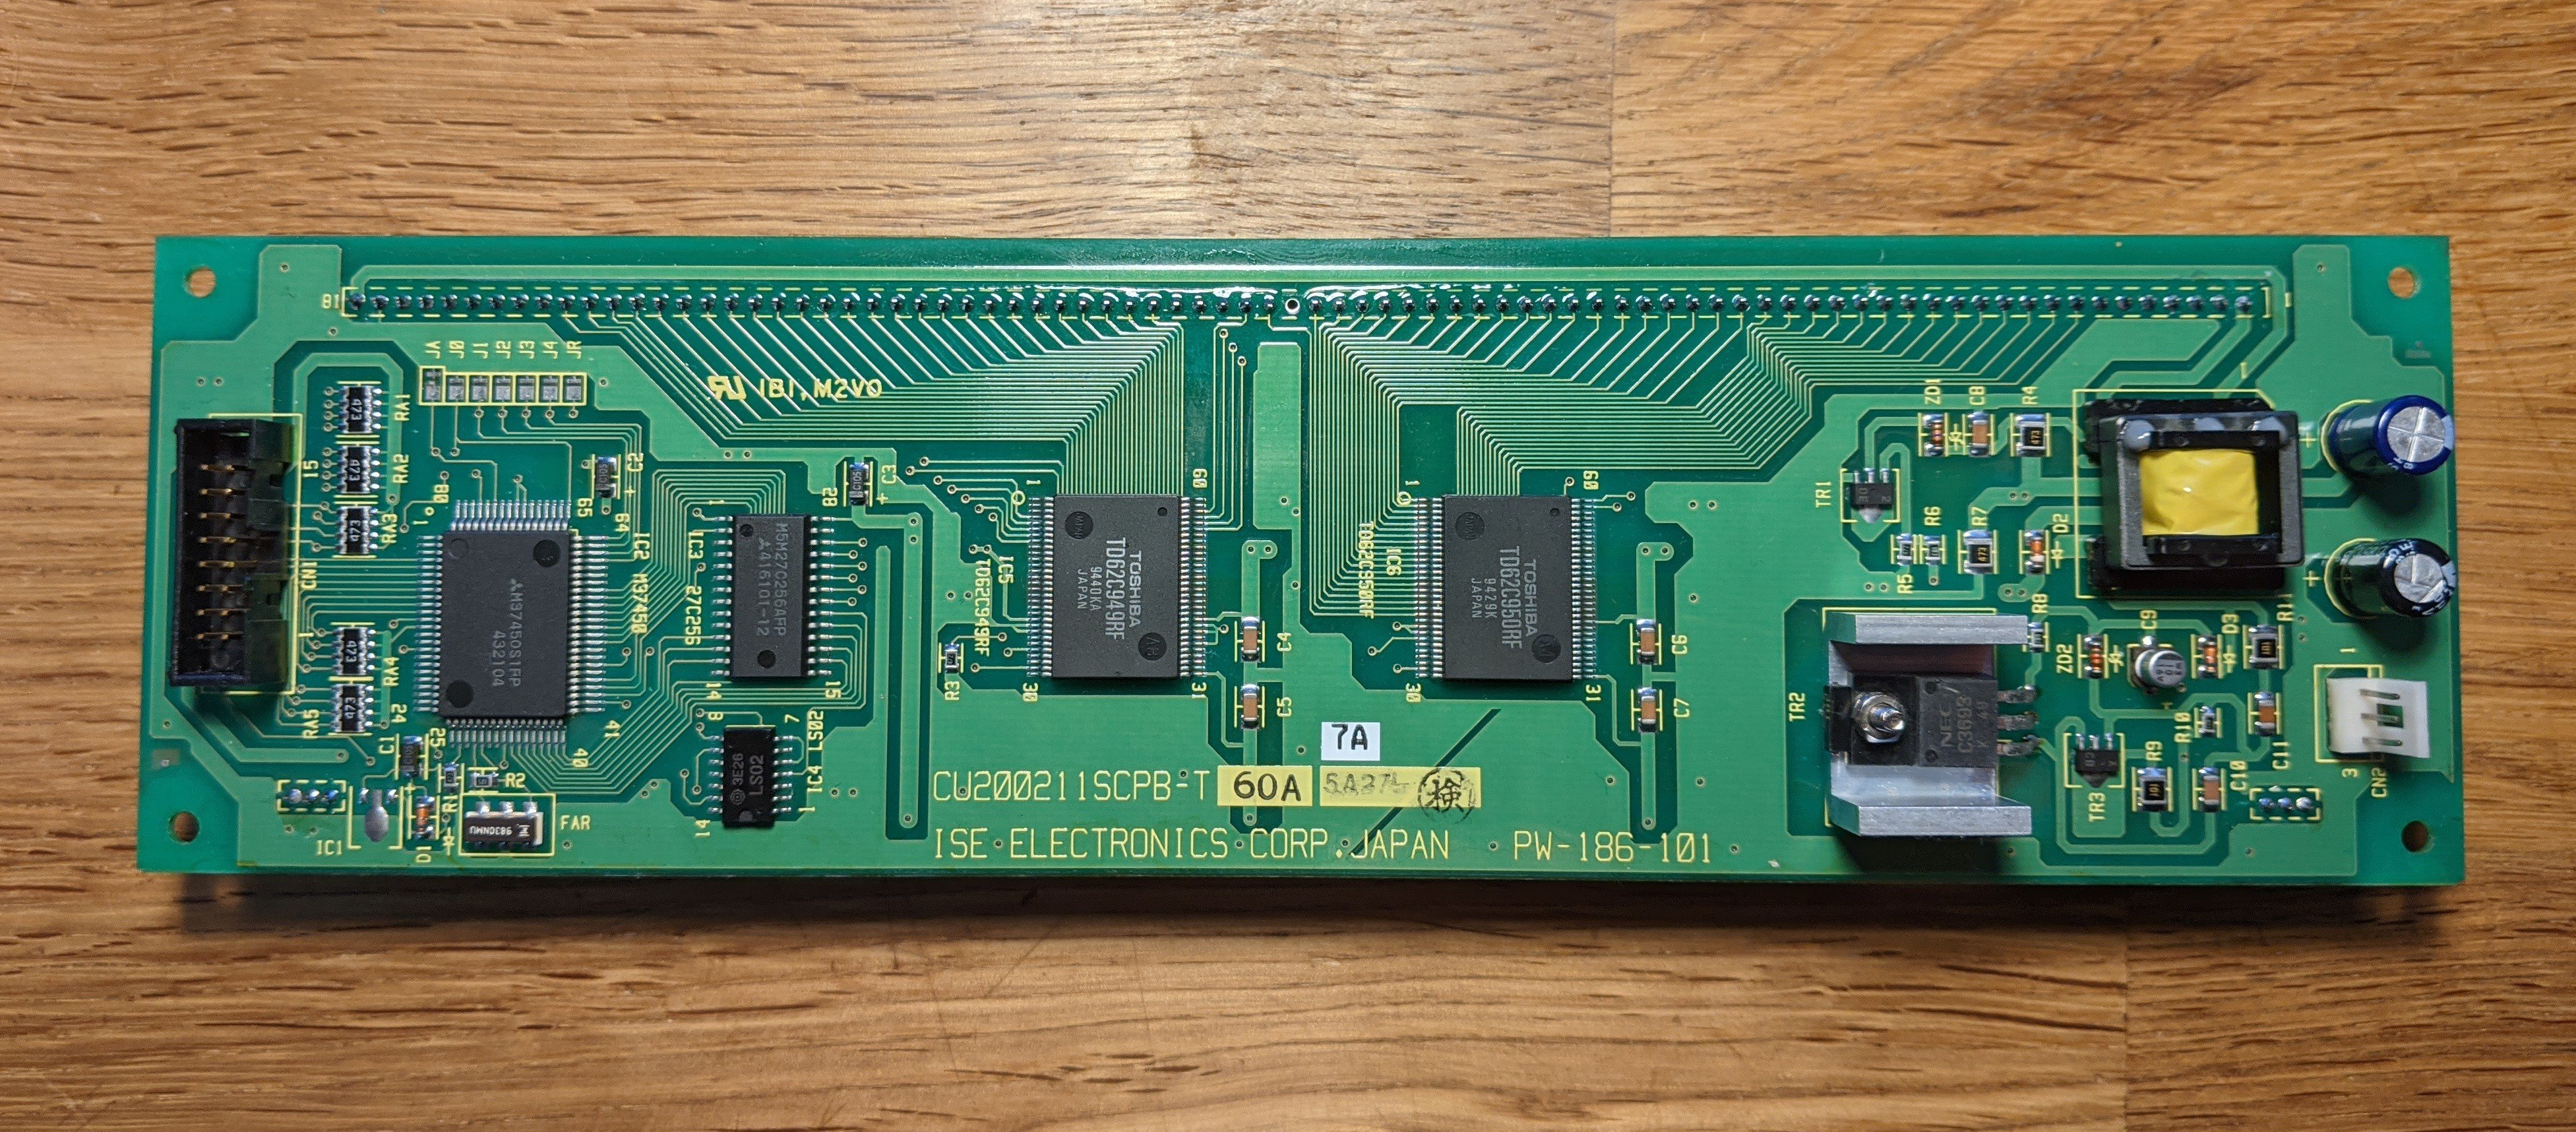
It is a CU200211SCPB-T60A from ISE Electronics Corp. Japan / Noritake Itron Corp. and it
has two rows of 20 characters, where each is a small 5x7 dot matrix – display refresh driver
and interface logic is all on-board. It may look a little daunting at first but three wires
is all you need to put text on the display: GND, VCC and a serial TX. These pins are
available on both CN1 and CN2. Be aware that the datasheet lists the power supply current
at 5V as 1100 mA; if you plan to power the entire display through a serial adapter make sure
your USB port can handle this current. Connector pinouts, special instructions and the
character font table can be found in the single-page datasheet.
The first thing is to make sure that the serial port is configured correctly. Take a look at
the solder jumpers J0..4 next to CN1: if they’re all left open then you need 19200 baud,
8 databits and even parity. To get going quickly I used this picocom command:
picocom --baud 19200 --flow none --parity even /dev/ttyUSB0You can start typing right away and the display will write it out in its beautiful blue-green-ish glow.
To send hexadecimal commands directly from picocom use C-a C-w. For example clearing the display: ```*** hex: 0E *** wrote 1 bytes *** ```
After a few minutes of experimenting with the instructions I cobbled together a quick date and time display – what else?
#!/usr/bin/env bash

# setup serial line
PORT="${PORT:-/dev/ttyUSB0}"
picocom --quiet --baud 19200 --parity even --flow none --databits 8 --noreset --exit "$PORT"

# software reset for clean slate
echo -ne '\x1b\x49' >"$PORT"
sleep 0.5

# apply settings
echo -ne '\x1b\x4c\xff' >"$PORT" # full brightness
echo -ne '\x16'         >"$PORT" # disable cursor

while true; do

  # reset position and print date line: "Wed, 21. Oct 2020"
  printf '\x0c %s' "$(date '+%a, %d. %b %+4Y')" >"$PORT"

  # line feed and print wall clock: "16:11:55.4133 CEST"
  printf '\x0c\x0a %s.%.4s %s' $(date '+%T %N %Z') >"$PORT"

done
Second script: RAM display
Wasn’t this simple? Note that there is a “Flickerless Write” instruction in the datasheet but I haven’t figured out how to use it yet.
To be fair, I haven’t looked at the hardware much yet either. But this concludes my initial exploration of the serial interface of this Noritake VFD for now.